Wednesday, April 27, 2011

Craft-E-Corner Giveaway Tuesday- Straight from the Nest cartridge!


Visit Craft-E-Corner's blog for a chance to win the awesome Straight from the Nest Cricut cartridge! This one looks really cute! If you or someone you know has a Cricut but you don't have this cartridge, please visit her blog by midnight CST 4/27/2011 and leave a comment on the giveaway post for a chance to win!

Thursday, April 21, 2011

My Pink Stamper Cricut Expression 2 giveaway!!


Robyn of My Pink Stamper is giving away a new Cricut Expression 2 on her blog! The winner will be announced Monday night. Please visit her blog and/or Facebook page to get the details for all the ways you can enter to win. You can comment on her blog & FB posts as well as make posts on your own FB page or blog, and then go back to her blog and make a new comment for each post you have made to FB/blogs. This is very exciting. Good luck to all!

Monday, December 13, 2010

Shutterfly 2010 Blogger $25 Gift Certificate promotion!

Stocking Clothesline Christmas Card
Make unique Christmas cards with Shutterfly.
View the entire collection of cards.

Tuesday, December 7, 2010

Shutterfly 2010 Holiday Cards- "these are a few of my favorite things!"

Shutterfly as always has beautiful and fun designs for 2010 holiday cards and other photo products! I look forward to working with one of Shutterfly's great card designs to create our Christmas card this year. We're using a beautiful black and white portrait of our little boys for our card this year. Deciding on my favorite card instead of the right photo or photos is the more difficult task for me this year. Whatever design I choose will be one of the very colorful and vibrant card designs so there will be good and flattering contrast with the black and white portrait of our boys, and it will need to accommodate a landscape portrait.

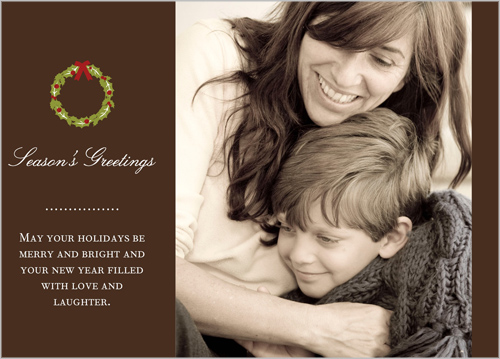
I think the Classic Wreath 5 X 7 photo card is gorgeous, but I don't think the shape and size of the area for the photo will work for the photo we're using this year. It's absolutely beautiful though and would use this design in a heartbeat! The warm chocolate brown and cheery wreath design are great!


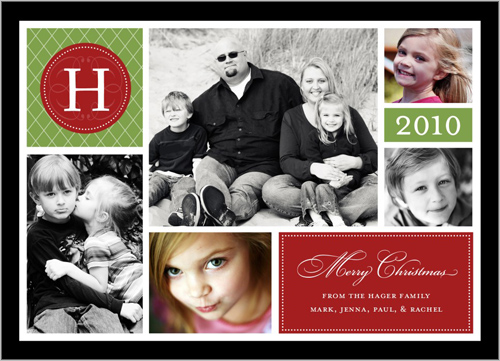
Shutterfly's "With Love Chartreuse Christmas Card" is a beautiful and modern twist on the traditional photo Christmas card. Bold and bright color contrast between the bright green and rich red is striking. The single initial monogram enclosed in a decorative circle is a great and modern touch. I'm one who usually has trouble narrowing down to just a one or even a few photos for photo cards. This card give you the incredible option of 5 photos on the front of one card! If you love multiple photo card layouts, this is a great fit for you! The font and filigree designs accenting this card are beautiful. I really love everything about this card! 5 photos, an initial monogram, the year prominently displayed, and space for a personalized greeting all on the front of one card makes this an excellent choice for your photo card needs.


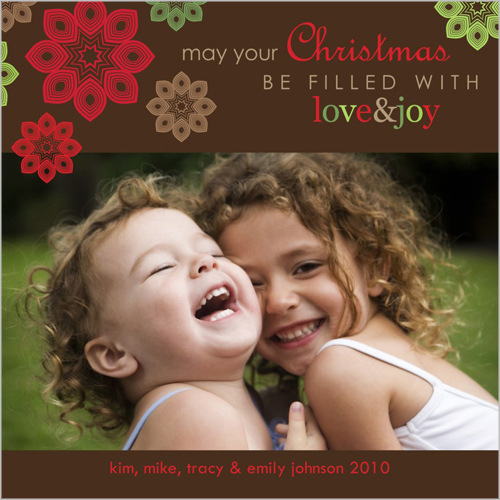
Shutterfly's Kaleidoscope Stars Christmas Card is a quirky and fun holiday card option for those looking for something unique, modern, and pretty. The square shape of the card is great and modern too. It's definitely not a traditional Christmas card design, but it's an awesome and attractive design that will appeal to many. It's a great card to showcase a landscape snapshot photo or portrait! I love the contrast between the rich and bright green and red and the chocolate brown.


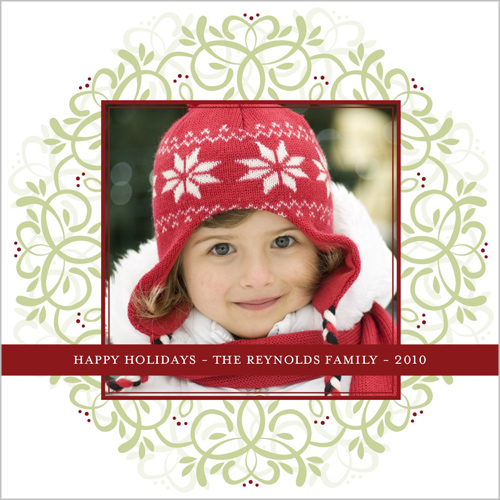
This Shutterfly Flourish Wreath Christmas Card card design is stunning! I love the filigree wreath design that frames the photo on this card. My only wish with this design would be for the background to be something other than white. It does look beautiful on screen, but I just wonder if the background would just look very blank and kind of like wasted space when printed and in person. The only reason I say this is I made a photo collage through a different photo printing service and much preferred the colored borders/background for my collage to the white background. I used the same exact collage design and photos and a colored background looked so much better. Despite this, this card is still one of my absolute favorites of the Shutterfly 2010 holiday card collection! The more I think about it, the white is the right background to not take away too much from the delicate green filigree wreath design. What would have improved this design would be a colored border, not a colored background. Had the entire card been "framed" in even a very thin red border it would have appealed to me even more. Isn't it just so lovely???


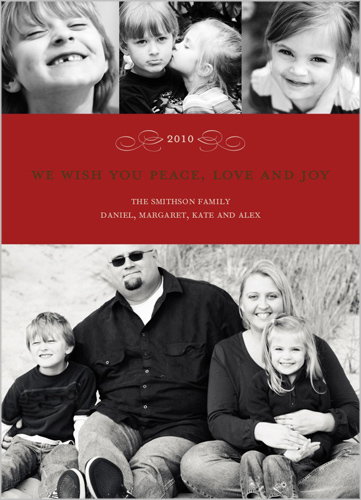
This Shutterfly 2010 Wishes Card is a simple yet beautiful way to showcase 4 photos on one card: one landscape large photo at the bottom and 3 square format photo spots are at the top. A beautiful flourish frames the year which and the personalized greeting is centered below the year. As you can see, it's the perfect card choice to provide beautiful contrast for your favorite black and white photos.


I'm happy to say I recently placed my first order with Shutterfly last month for a photo book. I was so impressed and loved it so much I ordered more books as soon as I received my first Shutterfly photo book. We spent a beautiful weekend in the NC mountains with my parents, my brother, and our two little boys. I commemorated our family trip with a Shutterfly photo book and couldn't be happier with the results. It's a beautiful book showcasing beautiful family memories! So many firsts happened on this trip too which makes it even more special.

Our 4 year old got to go fishing for the first time and he caught not one but 4 fish on his first day! We thought day 2 was a wash, but he finally caught one right before we almost called it a day. My dad was able to share this exciting first with his first grandson and it was so special. He also got to go gem mining for the first time, and my husband had never been gem mining before either. My brother and I hadn't been since we were kids so it was fun for all. My parents really enjoyed it with us also. I also did a little mountaintop photoshoot with our little guys, our youngest was 16 months old at the time and our oldest was about to turn 4. As you can imagine it's hard to coordinate photos of the two of them, but I managed to get a few precious shots. The view was amazing from the beautiful home a family friend so graciously allowed us to use for the weekend!

I can't wait to create a beautiful 2010 holiday card for our family using one of Shutterfly's awesome designs! I know I will love our holiday cards because the photo books are beautiful, high quality, and a great value!

If you currently have an established blog (new blogs created for the sole purpose of participating in this promotion would not be eligible), you may be interested in participating in Shutterfly's 50 Free Holiday Card promotion. Registration closes on December 10, 2010 and the promotion ends December 31, 2010.

Friday, November 12, 2010

Craft-E-Corner Giveaway Wednesday

Melissa at Craft-E-Corner is offering free product giveaways to followers of her blog for the rest of the year. To participate in Giveaway Wednesday, simply make a comment on her post about the new giveaway each week. To increase your chances of winning, you can spread the word about the giveaway via emails, posts on various social media sites, and blogging about the giveaway.

When you're done sharing the news of the giveaway each week, email Melissa with the various posts, comments, and emails you've written for your additional chances of winning before midnight on Tuesday.

The winner will be announced next Wednesday on her blog and you have 48 hours to email her you've spotted your name if you're the winner.

I'm so excited to say I was the winner of the first Giveaway Wednesday this week!! I'm very happily awaiting the arrival of the Nursery Rhymes Cricut cartridge. Thanks so much to Melissa for her generosity!! So be sure to visit Craft-e-Corner for your chance to win future giveaways. This week's giveaway is for an instructional DVD about using the Cricut from Robyn of MyPinkStamper. If you've watched her online tutorials you know this DVD would be extremely helpful to own.

Thursday, November 4, 2010

Giveaway Wednesday @ Craft-e-Corner!

Visit Craft-e-Corner's blog for your chance to enter her weekly giveaways of awesome crafting items. This is a great opportunity to possibly win some high value items to add to your crafting supplies! Your entry must be in the form of a comment on her post about the giveaway each week, and comments are due by midnight on Tuesday each week. You can have additional chances to win by posting about her giveaway on various social media networks as well as simply emailing friends & contacts about the giveaway. Her email address is listed in the post about the giveaway. Simply email her with all the posts & emails you sent about her giveaway for additional chances for you to win. She's also offering a weekly coupon code as well that's valid for 6 days, ending every Tuesday.

Sunday, November 1, 2009

My Halloween Cupcake Bites- Inspired by Bakerella

Inspired by the incredibly talented and creative Bakerella whose site/blog I recently discovered, I made these cupcake bites for a Halloween party yesterday. This was my first time making these and overall I was very happy with the result. I won't tell you how many hours, yes hours I spent making them though because I'm too embarrased to admit! Granted I probably began my project too late in the evening to begin with so I was more tired than I realized. I'm sure with practice it won't take so long in the future. But, due to the individual portion nature of these treats, it does take a while to roll and shape everything by hand in addition to the candy coating melting, dipping, and cooling steps.

Plus I tried to do some other shapes other than round balls for the cake part of these treats but they didn't hold up well in the dipping process maybe because the coating was pretty thick and a little stiff. I felt like it'd need to be much more liquid/runny to be able to coat them so evenly and smoothly like Bakerella does and without the filling falling apart. I tried to make ghosts which wasn't too hard to shape by hand, but like I said trying to coat them was very difficult. They might have needed to set in the freezer alot longer before dipping than the balls for the cupcake bites. I'm thinking that was the problem with the ghosts since they are free standing like the cake balls and cake pops on her website and she said to let the cake balls chill several hours before dipping them. With the cupcake bites, you need only chill them a few minutes because you're going to be placing them into melted candy bases that harden and make them sturdy before dipping the top half in "frosting." The cupcake bites were far easier to make than the ghosts and cake balls for me. For now, I think I'll stick to making the cupcake bites in the future because they are fairly easy to make and I love the look of cupcakes!

I didn't have the pleated mini Reese's cup-style candy mold, so I improvised and used a mini muffin pan to mold the base of these "cupcakes." I really think the smooth bottom half looks just as cute as the crinkled look achieved with that mold, but I'd still love to get one of those molds and give that a try too because Bakerella's are super adorable. The "frosted" tops of her cupcake bites have an awesome extremely smooth appearance ( I have no idea how she does this but it looks beautiful and I'd love to pull it off myself sometime). One dip attempt into the process I decided not to try achieving this smooth look due to the thickness of the candy coating so I went to town with the spreader dabbing globs of melted candy coating on top of my cupcake bites and spreading with the same strokes I'd use to frost actual cupcakes. I'm happy with this textured frosting look and think it looks pretty cool too.

I used Betty Crocker Milk Chocolate cake mix, Betty Crocker cream cheese frosting, and Wilton candy melts in orange, white, and black. I dusted the tops with orange sugar I scored from Target's $ Spot.

What you'll need:

1 box cake mix in desired flavor
1 16 oz. container of cream cheese frosting
Candy coating melts, bark, or other chocolate that melts well for dipping
Wax or parchment paper
cookie sheet or other type of flat tray
decorative sprinkles, sugar, or other candy is optional
  1. First, bake your cake and then let cool completely before crumbling.
  2. Crumble your cake by spoon or hand, hands are easier and more fun! (I wore Mr. Clean latex free gloves I have for household cleaning since they said they are approved for food preparation. This kept anything from sticking to me, plus I wanted to be very sanitary since I was taking these to a party. Wearing the gloves also takes away they worry about fingerprints when handling the cupcake bites to dip or "frost" the tops. Of course you can wear any food preparation gloves like they wear in bakeries/delis or special candy making gloves.)
  3. Stir the cream cheese frosting into the crumbled cake and mix by hand. Again the gloves were a huge help with this and I can't imagine doing it without.
  4. Roll mixture into desired size balls. Bakerella suggests quarter sized and that was about the right size to place into the melted candy bottoms in my mini muffin tin. Place balls on wax or parchment paper covered cookie sheet and chill in freezer for a few minutes. Bakerella suggests 3 minutes. Don't worry if they're in there a little longer because mine weren't in any danger of freezing in the few extra minutes they were in there.
  5. Melt desired color of candy coating for cupcake bottoms. Spoon in about a teaspoon-teaspoon and a half or so of melted candy into your mold, muffin tin, or other container of choice. Immediately place a cake ball into the center of each opening filled with melted candy making the coating come up around the sides of the cake ball but not all the way to the top so it looks like a cupcake. Place them into the freezer for a few minutes to harden the candy coating bottoms and set the cake balls in place in it. - I just kind of eyeballed what I thought would be a good amount of melted coating, about 3/4 filled and this worked out perfectly. Any less than half full made bottoms that were too hard to hold onto to "frost" or dip the tops.
  6. Melt desired color of candy coating for cupcake tops. Remove cooled and hardened bottoms from the freezer and one by one dip or frost the tops of the cupcakes with the melted candy coating and place on a wax or parchment paper covered cookie sheet. Before the tops harden decorate the tops with sprinkles, sugar, or other candy if you want.
  7. Have fun admiring all of your hard work and force yourself to taste test one. It's a tough job, but someone has to do it. I can't wait to try these in different colors and themes. They would be adorable at baby or bridal showers and I may even make some for my sons' birthday parties in the future. Thank you Bakerella for your incredibly creative ideas!!!
Here's a cross-section view of the outer layers and filling. This one had a white chocolate bottom since I ran out of black coating.

Arial view of the cupcake bite tops